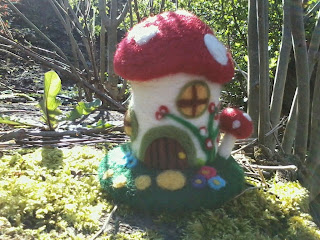
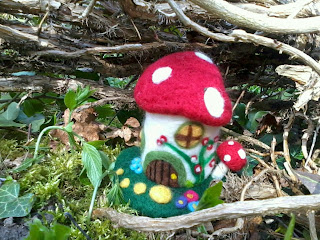
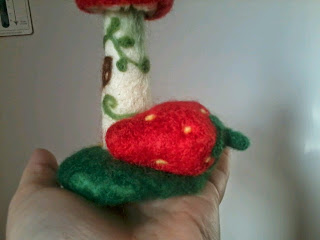
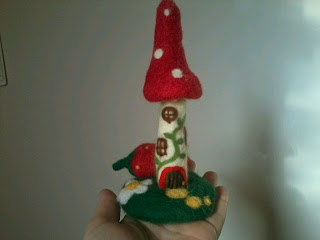
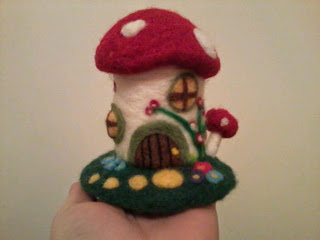
Whilst I have not been very active on my blog of late, I assure you that I have been very busy with some new creations (and they have been my favourite things to make so far!) Here are some enchanting little fairy houses that I've been working on. I took a couple of them out into the woods to try to photograph them in a natural environment & I love how they look!
Tuesday, 22 April 2014
Fairy Houses!
Hello again!
Whilst I have not been very active on my blog of late, I assure you that I have been very busy with some new creations (and they have been my favourite things to make so far!) Here are some enchanting little fairy houses that I've been working on. I took a couple of them out into the woods to try to photograph them in a natural environment & I love how they look!


Whilst I have not been very active on my blog of late, I assure you that I have been very busy with some new creations (and they have been my favourite things to make so far!) Here are some enchanting little fairy houses that I've been working on. I took a couple of them out into the woods to try to photograph them in a natural environment & I love how they look!
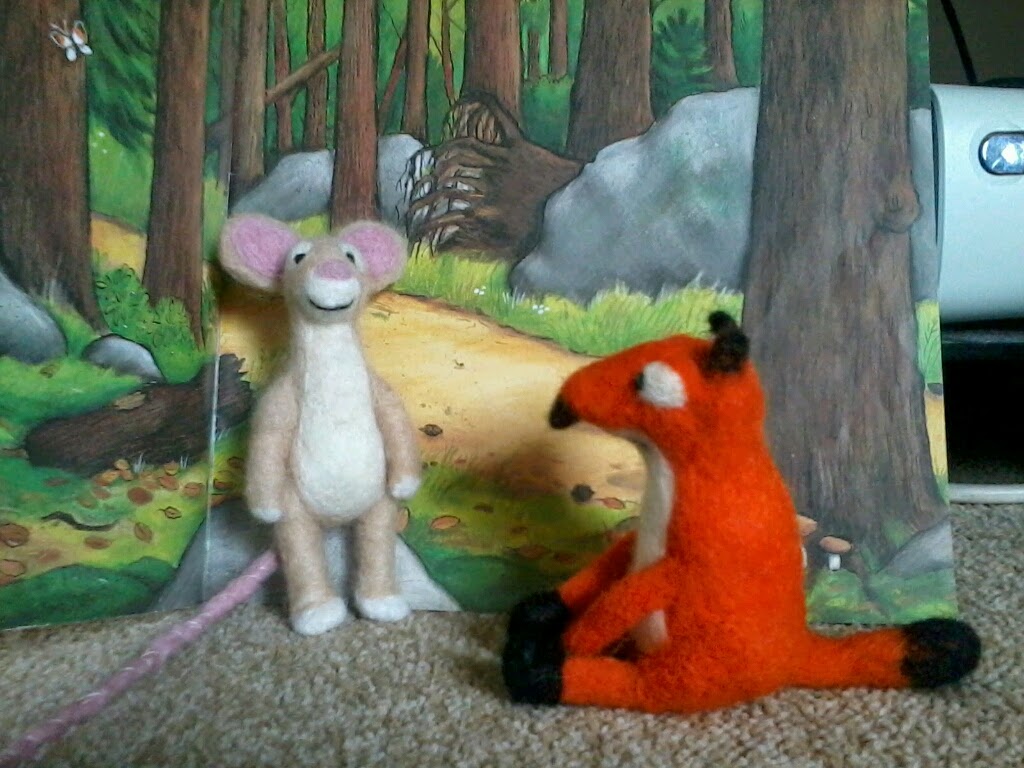
The Gruffalo Fox - Latest Addition!!
Effie Trinket Minion!
I recently ran a giveaway on my Facebook page, where I allowed the winner to pick their own style of minion. My winner picked this minion, Elizabeth Banks as Effie Trinket in The Hunger Games;

And this is what I came up with! (sorry the picture quality is not great)


She is now on her way to her new home!

And this is what I came up with! (sorry the picture quality is not great)
She is now on her way to her new home!
Tuesday, 1 April 2014
Needle Felted Tulips
Hello again!
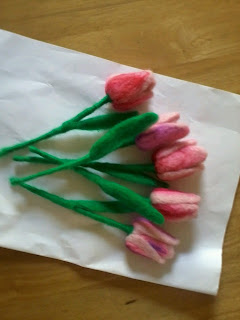
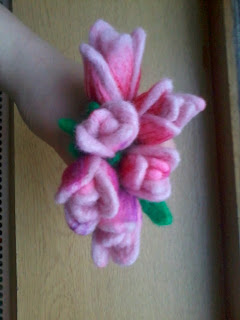
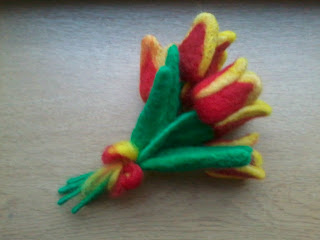
I've been wanting to have a go at making some tulips for a while now, and Mothers Day was the perfect excuse. I made 2 bunches of tulips, one pink & purple and the other was red & yellow. There are six flowers in each bunch, and with hindsight I would have started them a lot sooner than I did as they took an excruciatingly long time! I only just managed to finish them in time for the big day!


I've been wanting to have a go at making some tulips for a while now, and Mothers Day was the perfect excuse. I made 2 bunches of tulips, one pink & purple and the other was red & yellow. There are six flowers in each bunch, and with hindsight I would have started them a lot sooner than I did as they took an excruciatingly long time! I only just managed to finish them in time for the big day!
Needle Felting; Stuart the Minion
Hi Everyone!
It's been quite a while since my last blog post, but I assure you that I have been busy!
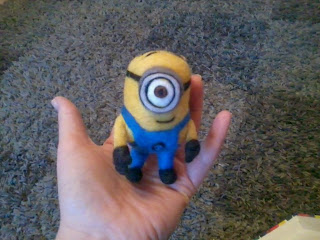
I received a special request from a friend to make another Minion, Stuart. And this time I went the whole hog & gave him legs and feet, which my other minion unfortunately never got!!! It was a bit of a challenge doing his fingers, as they are quite small, but I got there in the end!!! Let me know what you think!!


It's been quite a while since my last blog post, but I assure you that I have been busy!
I received a special request from a friend to make another Minion, Stuart. And this time I went the whole hog & gave him legs and feet, which my other minion unfortunately never got!!! It was a bit of a challenge doing his fingers, as they are quite small, but I got there in the end!!! Let me know what you think!!
Tuesday, 11 February 2014
Wet Felted Easter Egg Surprises.
Hi Everyone!
So it's nearly that time of year again!! (Easter!) And you know what that means! Time to get crafty!!!
So last year, I created my first ever blog post after making some Easter Egg Surprises from Paper Mache (you can see that post here if you like). They were hollow so that they could be filled with treats, and they were durable so they could be re-used if needed. The kids absolutely loved them, and they were really fun to make. But seeing as how I have acquired some new crafty skills since then using wet and needle felting techniques, I was sure that I could come up with something even better this year.
And so I got all my stuff together.... Plastic egg moulds, Dyed Merino Wool roving, Ribbons & Embroidery Thread
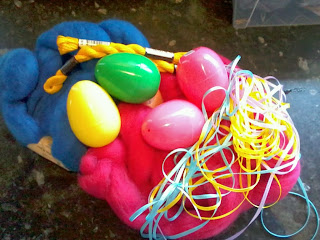
And started to make a mess in the kitchen!

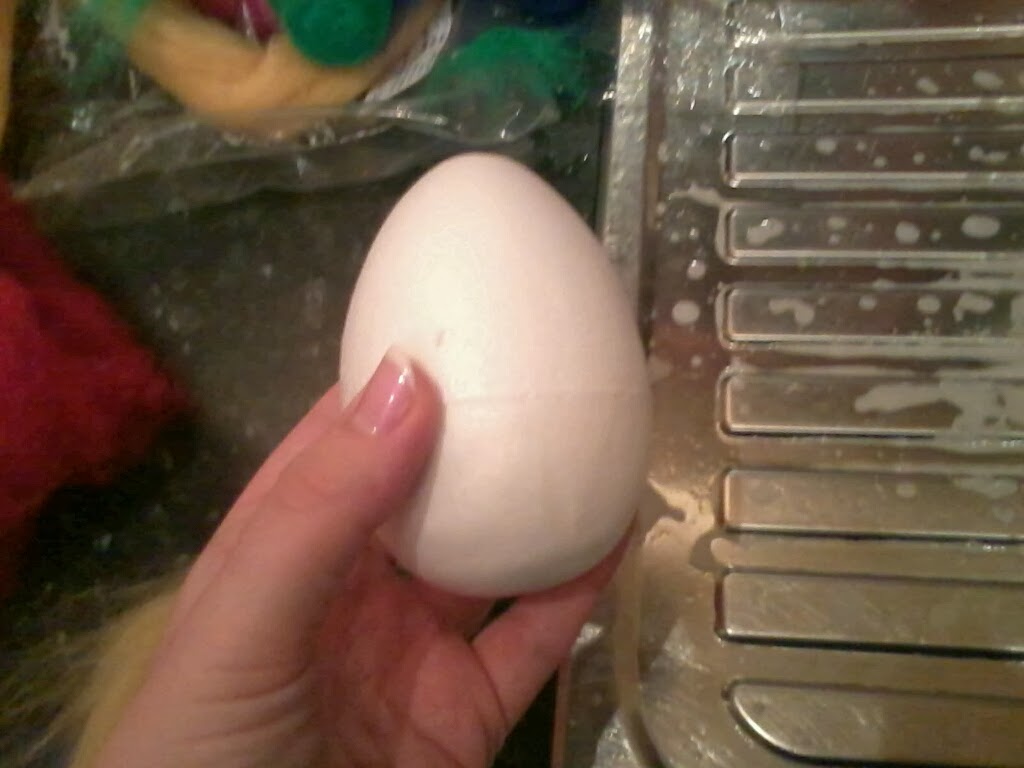
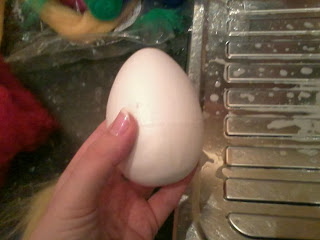
I used different sized 'egg' moulds, or resists. The larger ones were polystyrene, and the smaller coloured ones were those plastic eggs filled with treats that you can buy in the shops. The example you can see in the next photos were using the polystyrene egg shape. I wrapped the egg in white roving, followed by layers of coloured roving. I found that I could get a smoother shape if I began wetting & smoothing each layer before adding the next layer - hence once my hands were soapy it was difficult to take any more pictures, so I only took the photo before I started to felt.
Edit: For those who don't know how to wet felt - fill a bowl with hot soapy water. Wrap roving around your egg shape - I did this in individual layers. Using white roving first, wrap around the egg in one direction, and then do an alternating layer running at 90 degrees to the first layer (like cross hatching). I found that by starting to felt this layer first and then add to it, I got a smoother finish. So, take your egg shape wrapped in roving, hold the roving as tightly to the egg as possible & submerge into the soapy water for a few seconds, to allow the wool to get fully wet. Keep the roving tight to the egg as you bring it out of the water. Then get a little soap on your hands and begin to gently squeeze, or press the wool around the shape & get all the air out, it will try to stick to your fingers so with a soapy hand, try to keep smoothing down any stray fibres.
Once they stay in place, add another layer of white roving and do the same - I find using fairly thin layers works best, but I am no expert - this is just my personal experience.
Try to ensure there aren't any thin patches & that you can't see the egg through the fibres. Once this layer is all smooth, then do the same with coloured roving of your choice until you are happy with the thickness & satisfied that it is of an even thickness all over. Now get your hands nice and soapy and keep pressing all around (the wool should start to 'shrink' and loose any bagginess (is that a word?) keep pressing until it begins to felt, which means the fibres start sticking to each other, and when they do, you can start rubbing - think about how you would roll a bar of soap around in your hands, that's how I did it, any way. Try to keep some pressure, and just keep going, in all directions until you are satisfied that it is fairly well felted. Keep dunking them in the hot water every now and then, and add a little more soap to your hands when needed. At the end, give them a rinse in cold water to get the soap out.
Once I finished felting them, I squeezed out any excess water using a towel, and then I chucked them all in the tumble dryer for half an hour or so, to give them a good bashing! The heat and the 'bashing' helps to complete the felting process.


This is the result of the multi-coloured one you saw me start in the picture

And these are some pink and blue ones that I made using the smaller plastic egg moulds. I did the inside layer in white for all of them, so they are white on the inside & coloured on the outside.
So once they were completely dry, I cut them open using a blade & removed the mould.
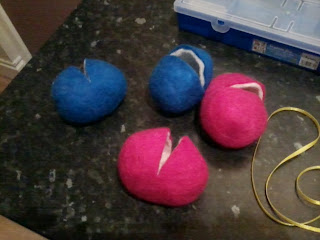
I then did a blanket stitch around the opening using embroidery thread. (And,yes I'm wearing pink Pyjama's!)
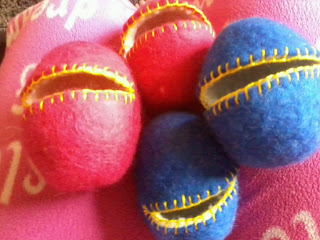
And finally, added some decorative stitching, and a ribbon to fasten. Now they are ready to be filled with goodies & dished out to the kids at Easter!
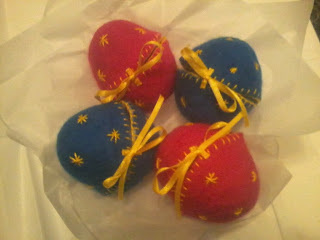
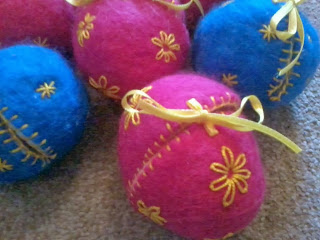
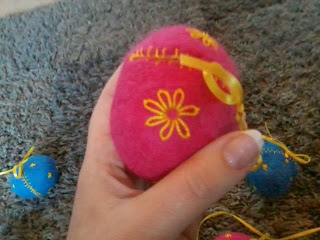
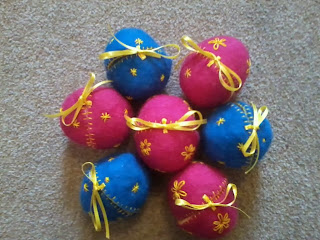
Ta Da!
As I said I am by no means an expert, and am relatively new to felting, but if you have any questions (or tips!!) feel free to contact me, either through this page, or you can find me on Facebook
Update: Here is a picture of one of my finished eggs, filled with Easter treats! My Daughter, Nieces and Nephews absolutely loved them!

So it's nearly that time of year again!! (Easter!) And you know what that means! Time to get crafty!!!
So last year, I created my first ever blog post after making some Easter Egg Surprises from Paper Mache (you can see that post here if you like). They were hollow so that they could be filled with treats, and they were durable so they could be re-used if needed. The kids absolutely loved them, and they were really fun to make. But seeing as how I have acquired some new crafty skills since then using wet and needle felting techniques, I was sure that I could come up with something even better this year.
And so I got all my stuff together.... Plastic egg moulds, Dyed Merino Wool roving, Ribbons & Embroidery Thread
And started to make a mess in the kitchen!

I used different sized 'egg' moulds, or resists. The larger ones were polystyrene, and the smaller coloured ones were those plastic eggs filled with treats that you can buy in the shops. The example you can see in the next photos were using the polystyrene egg shape. I wrapped the egg in white roving, followed by layers of coloured roving. I found that I could get a smoother shape if I began wetting & smoothing each layer before adding the next layer - hence once my hands were soapy it was difficult to take any more pictures, so I only took the photo before I started to felt.
Edit: For those who don't know how to wet felt - fill a bowl with hot soapy water. Wrap roving around your egg shape - I did this in individual layers. Using white roving first, wrap around the egg in one direction, and then do an alternating layer running at 90 degrees to the first layer (like cross hatching). I found that by starting to felt this layer first and then add to it, I got a smoother finish. So, take your egg shape wrapped in roving, hold the roving as tightly to the egg as possible & submerge into the soapy water for a few seconds, to allow the wool to get fully wet. Keep the roving tight to the egg as you bring it out of the water. Then get a little soap on your hands and begin to gently squeeze, or press the wool around the shape & get all the air out, it will try to stick to your fingers so with a soapy hand, try to keep smoothing down any stray fibres.
Once they stay in place, add another layer of white roving and do the same - I find using fairly thin layers works best, but I am no expert - this is just my personal experience.
Try to ensure there aren't any thin patches & that you can't see the egg through the fibres. Once this layer is all smooth, then do the same with coloured roving of your choice until you are happy with the thickness & satisfied that it is of an even thickness all over. Now get your hands nice and soapy and keep pressing all around (the wool should start to 'shrink' and loose any bagginess (is that a word?) keep pressing until it begins to felt, which means the fibres start sticking to each other, and when they do, you can start rubbing - think about how you would roll a bar of soap around in your hands, that's how I did it, any way. Try to keep some pressure, and just keep going, in all directions until you are satisfied that it is fairly well felted. Keep dunking them in the hot water every now and then, and add a little more soap to your hands when needed. At the end, give them a rinse in cold water to get the soap out.
Once I finished felting them, I squeezed out any excess water using a towel, and then I chucked them all in the tumble dryer for half an hour or so, to give them a good bashing! The heat and the 'bashing' helps to complete the felting process.


This is the result of the multi-coloured one you saw me start in the picture

And these are some pink and blue ones that I made using the smaller plastic egg moulds. I did the inside layer in white for all of them, so they are white on the inside & coloured on the outside.
So once they were completely dry, I cut them open using a blade & removed the mould.
I then did a blanket stitch around the opening using embroidery thread. (And,yes I'm wearing pink Pyjama's!)
And finally, added some decorative stitching, and a ribbon to fasten. Now they are ready to be filled with goodies & dished out to the kids at Easter!
Ta Da!
As I said I am by no means an expert, and am relatively new to felting, but if you have any questions (or tips!!) feel free to contact me, either through this page, or you can find me on Facebook
Update: Here is a picture of one of my finished eggs, filled with Easter treats! My Daughter, Nieces and Nephews absolutely loved them!
Needle Felted Valentines Roses.
Hi everyone!
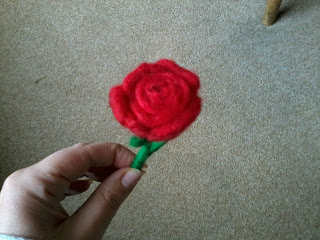
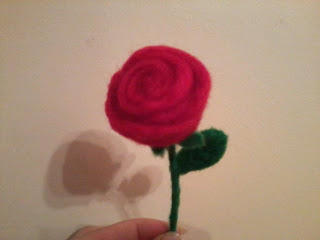
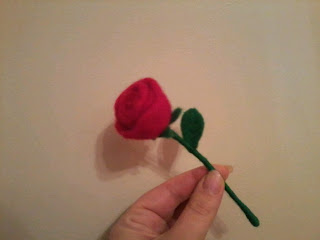
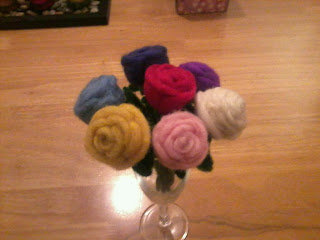
Welcome back! I thought I would just pop in and share with you some of my latest creations. As it's almost Valentines Day, I felt (no pun intended!) it would be appropriate to get a little romantic & had a go at making some Roses. I really like how they turned out.
I also received a request to make a bunch of different coloured roses. I wasn't too sure that they would look good, one in each colour, I thought contrasting colours would have looked better, but, once finished I think they look great altogether.
Welcome back! I thought I would just pop in and share with you some of my latest creations. As it's almost Valentines Day, I felt (no pun intended!) it would be appropriate to get a little romantic & had a go at making some Roses. I really like how they turned out.
I also received a request to make a bunch of different coloured roses. I wasn't too sure that they would look good, one in each colour, I thought contrasting colours would have looked better, but, once finished I think they look great altogether.
Subscribe to:
Posts (Atom)